A Starter LinkedIn Campaign for MSPs

By Derek Marin
Who are your MSP’s biggest fans? Who loves your team’s work and also knows you personally?
Your clients, of course!
And your clients, especially the C-Levels, already trust you and happen to be the ones who know many potential prospects for your managed or co-managed services.
The purpose of this starter LinkedIn campaign is to help you take a real step towards leveraging those happy clients for referrals.
Now, if you want another tips article or to be persuaded into the benefits of LinkedIn for sales, stop reading here, please. This campaign is not for you.
On the other hand, if you’re an MSP leader who has had it with analysis paralysis and is ready to become a social seller, buckle up because you’re in the right place!
1. State your Campaign Goal and Timeline
Articulating objectives is a simple yet often overlooked step in sales and marketing planning. If we approach our efforts on LinkedIn scientifically, we’re more likely to get positive results.
For example, if your MSP has 50 clients and you know the CEO and CFO from each, you could set an action goal of sending 100 connection requests.
If the max time is 30 minutes per week for social selling, that is fine! And with a clear activity-based goal, you can use those half-hour segments to complete the following steps.
Writing goals downturns dreams into targets, and targets help us plan, and plans drive our actions.
2. Finding Existing Clients on LinkedIn
If we continue with the example from step one, where the goal is to connect with 100 clients, then we need to start by organizing a list of our target people. While an Excel sheet can certainly do the trick, I will assume you are using Sales Navigator, the premium paid product owned by LinkedIn.
There are many advantages to using Navigator over LinkedIn or Excel, but that is a topic for a different article!
Okay, there are two places in Navigator where you need to find and track your clients; they are under “Accounts” and “Leads.”

Start by creating an Accounts list named “Clients.” Then use the search bar to find client companies or “accounts” as Navigator refers to them, and then save those accounts to the new list.
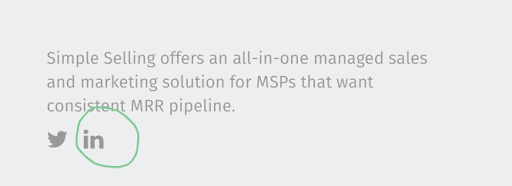
You may find it easier and more efficient to find client accounts by visiting their website. Websites are great for this because they typically contain a link to their LinkedIn company page down in the footer.
Next, take advantage of viewing a client’s account page and find the people you want. You can click on “All Employees” or “Decision Makers” to find them easier. Once you see a familiar face and name, click on the “save” button and add them to a Leads list you name “Client POCs.”
By the end of this step, you ought to have 2 populated lists in Navigator; an Account “Client” list with all of the client businesses and a Leads list with all primary points-of-contacts.
3. Engage with your Clients’ Content
Before you ask clients to connect with you, it’s a good idea to signal to them that you are present on LinkedIn and that you support their networking goals, too. Remember, your clients, especially the C-Levels, are not hanging out on LinkedIn for fun. Like you, they are trying to network, find prospects, and promote their brand.
So this step is about building some good karma with your clients before you ask them to connect.
For example, glance over their recent posts on LinkedIn and then hit the “like” button or comment, “Good info! Thank you.”
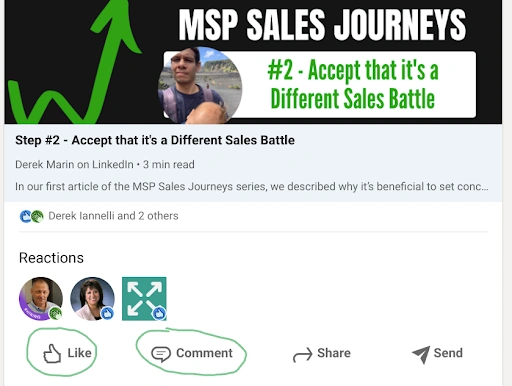
Don’t overdo it here. For example, do not read every article or post they have on their profile. That will slow you down. Unlike other social platforms, most content people post is work-related opinions. So think of it this way, your “like” on their content does not symbolize that you agree or disagree with their content, it means you are helping your client with their LinkedIn goals.
Friends help friends! So show your clients how you are helping them first before asking for something in return.
4. Send Connection requests
The final step is to send connection requests to each client contact on your list. It’s easy. Just hit “connect” from the person’s Navigator (or LinkedIn) profile page.
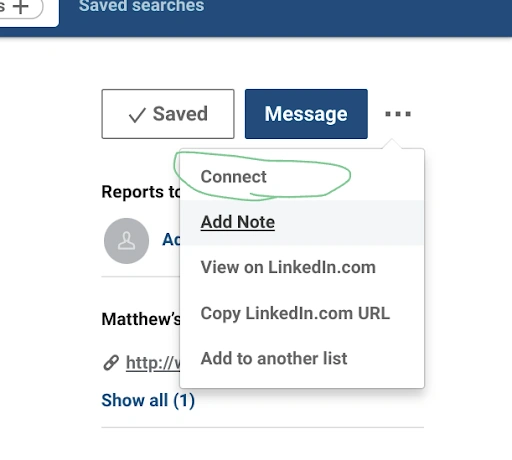
Yes, there’s an option for “Add Note,” but it is unnecessary since they know you already and presumably saw how you “liked” their content.
Now sit back, pat yourself on the back for taking action here and watch how your clients begin to accept your requests.
Great job! You are on your way toward building a social seller!
If you’ve thought about using LinkedIn Sales Navigator but aren’t sure how to use it effectively, don’t miss our live webinar: “How to Get Appointments with LinkedIn Sales Navigator and Maximize Sales.”
Shannon Murphy and I will provide more insights on how to get started with LinkedIn Sales Navigator so you can start getting more appointments.


.avif)
.avif)


